Creating Artifacts
Artifacts are a key source of evidence that accompanies a given security requirement. Totem contains a helpful workflow for uploading attachments into a “folder” known as an Artifact, which you can then “associate” with as many security requirements as you’d like. Artifacts allow for version control, saving you substantial manual effort re-associating static attachments when they are updated. This guide walks you through how to create an Artifact, associate with security requirements, and use the version control capability.
- Log in to Totem.
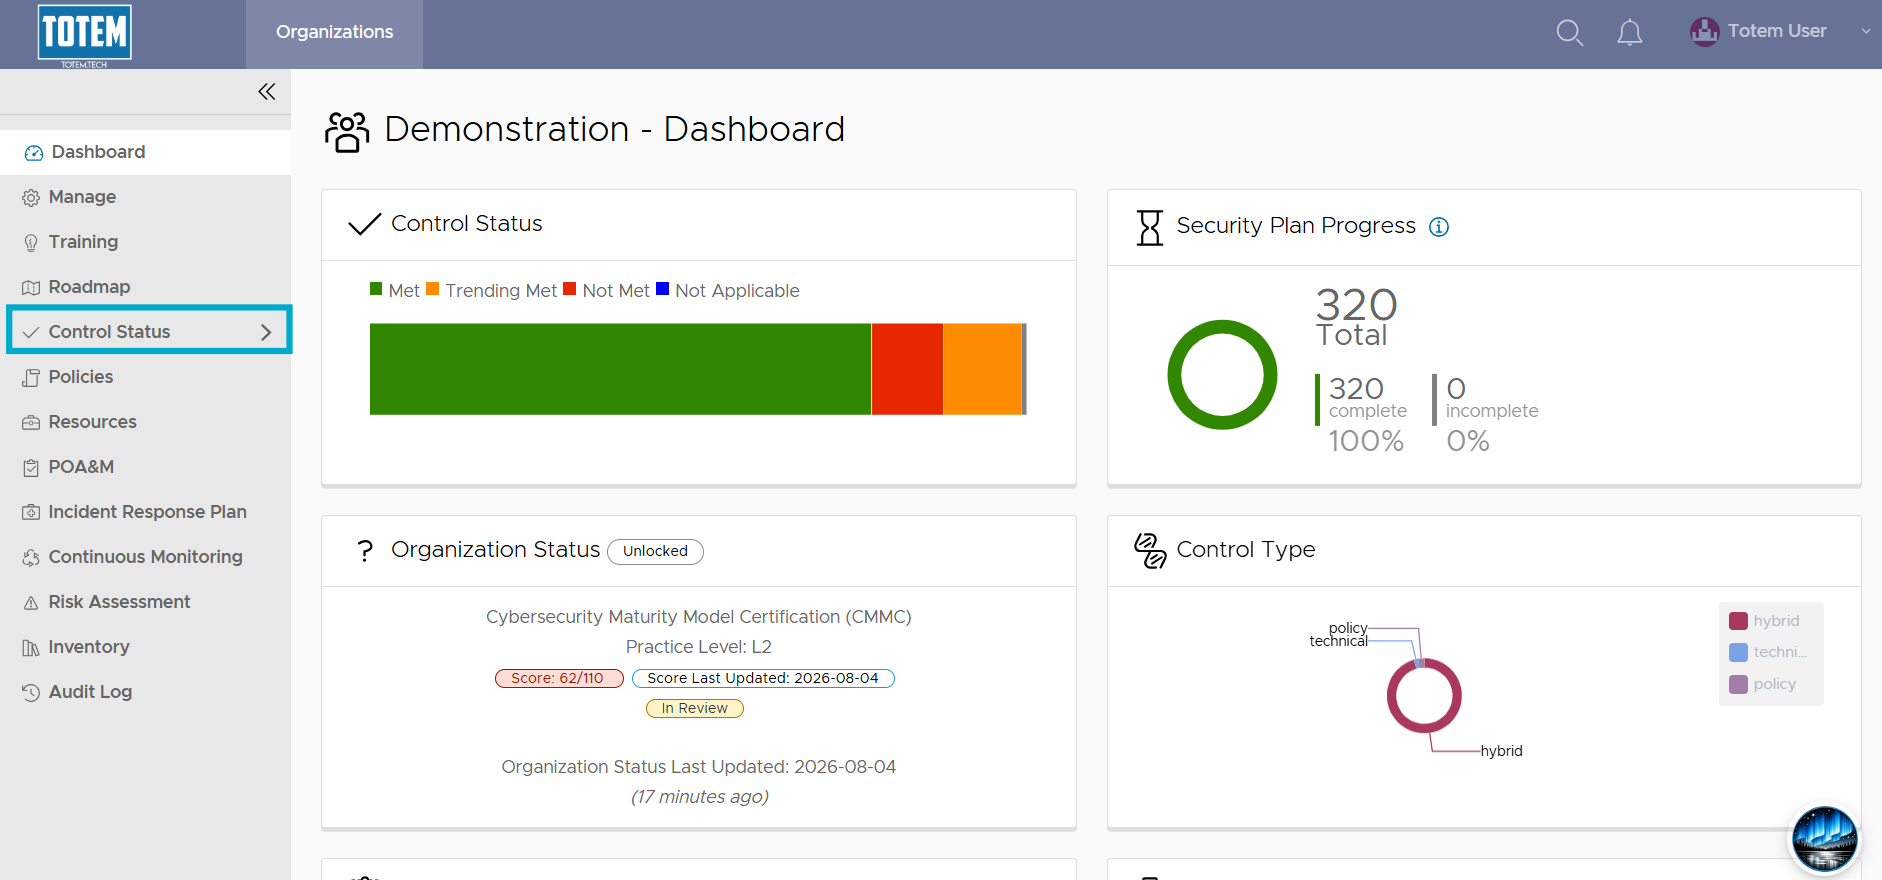
- Navigate to the Control Status module via the left-hand menu:
- Select Artifacts.

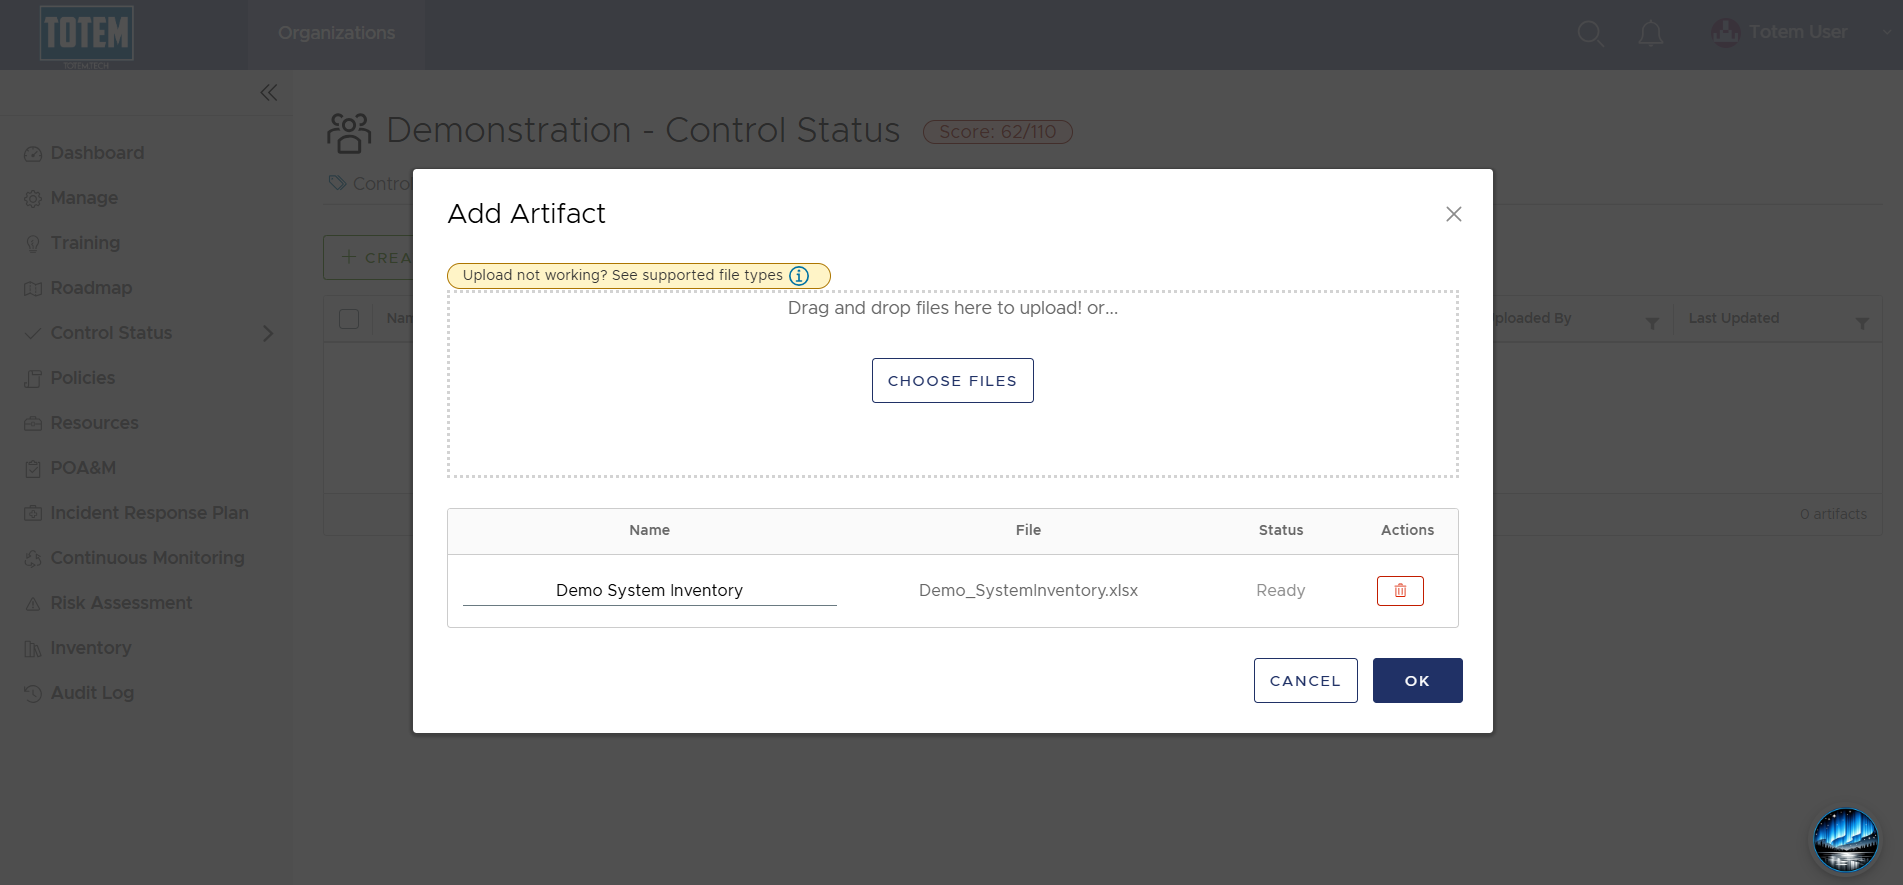
- Choose Create Artifact. Upload your preferred attachment (e.g., a supplemental policy document, a screenshot, etc.). Provide a name for the Artifact.
- Once your Artifact has been created, it now can be associated with any security requirements you choose. To do this, navigate to the Controls page.
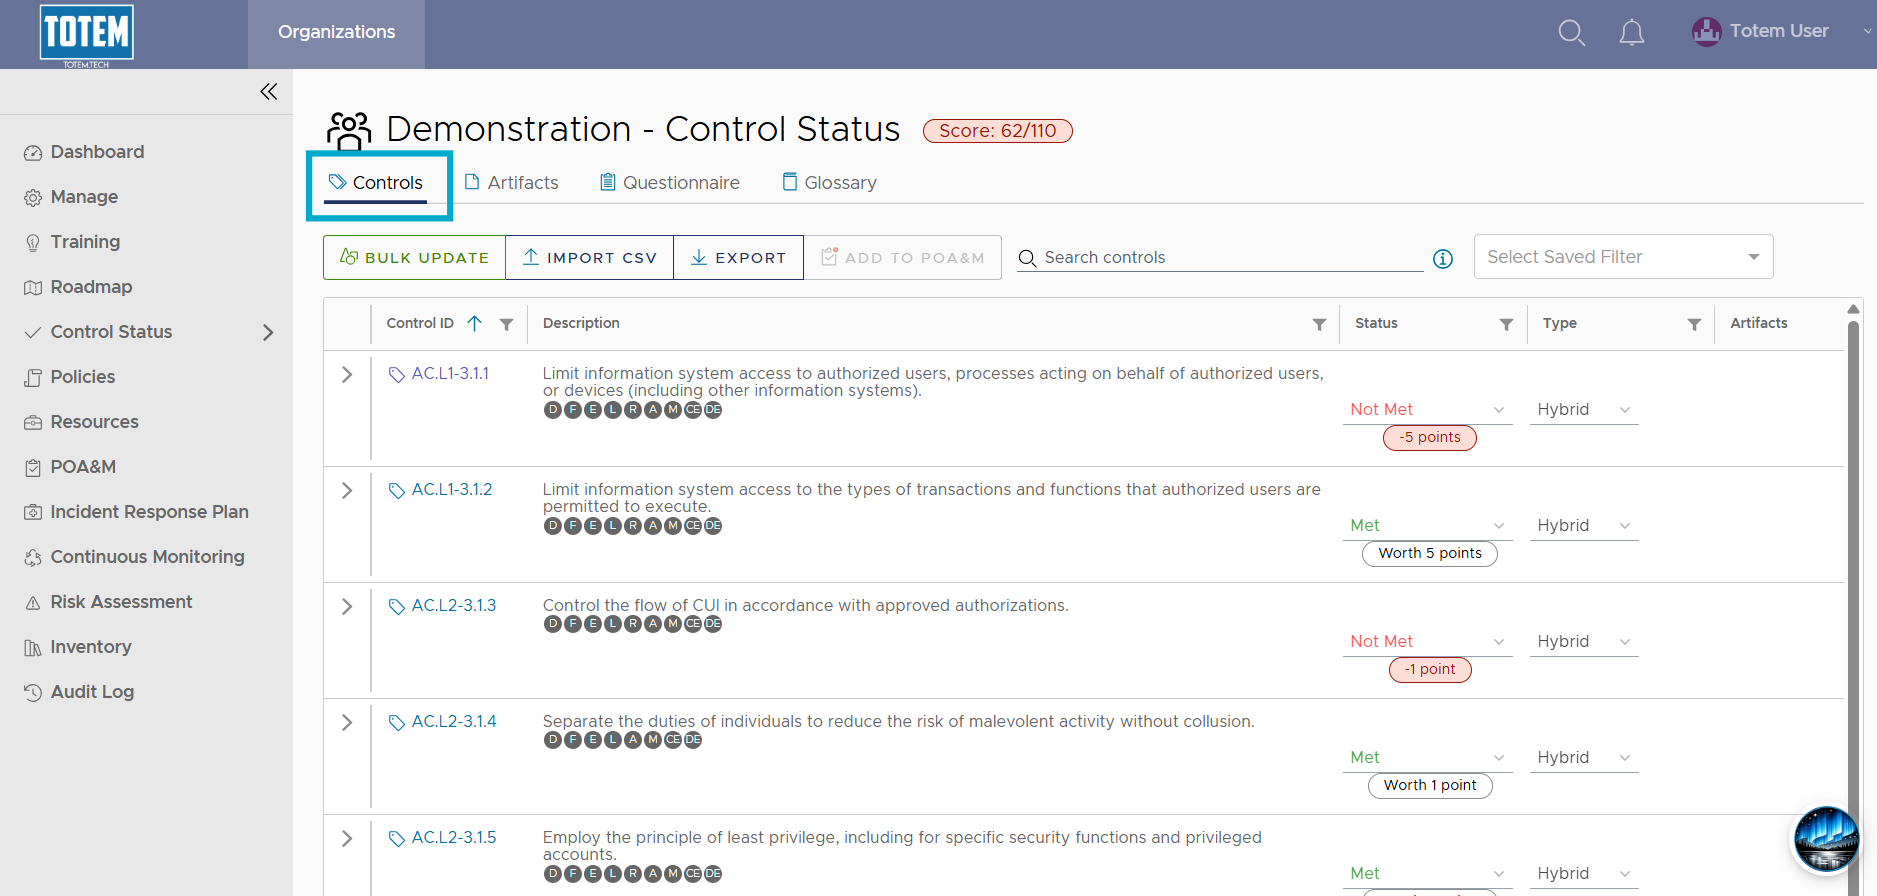
- Identify the security requirement(s) you’d like to associate the Artifact with. This will depend on what the Artifact is used for; for example, if your Artifact is a system inventory spreadsheet, it should be associated with security requirements that pertain to having a system inventory.
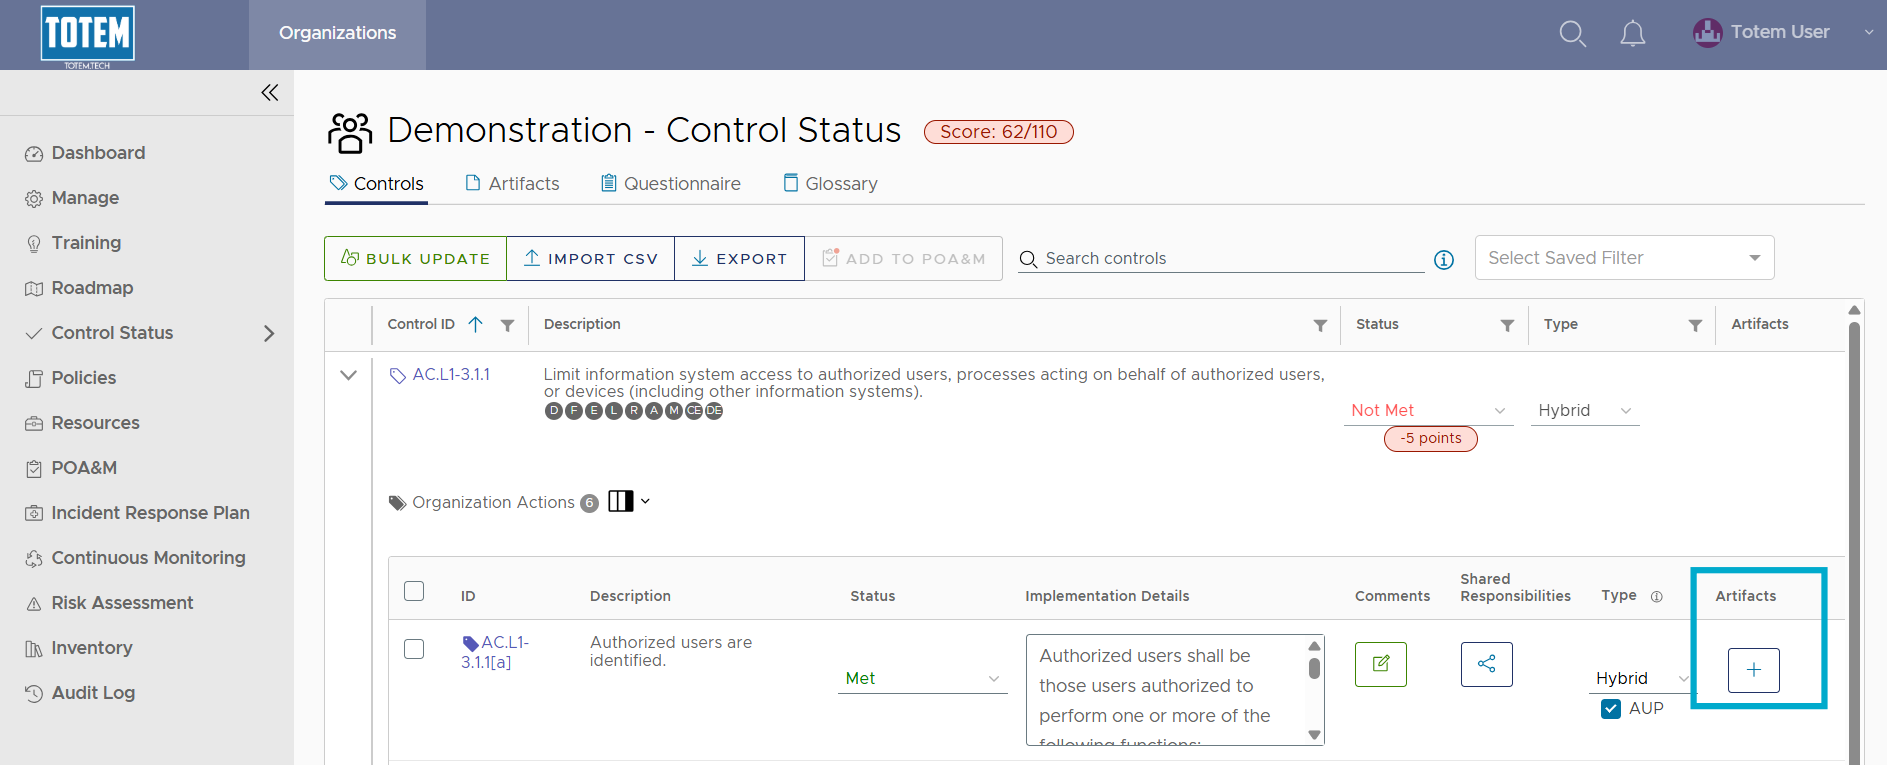
- To associate with a security requirement, select the “+” button next to the requirement (Organization Action).
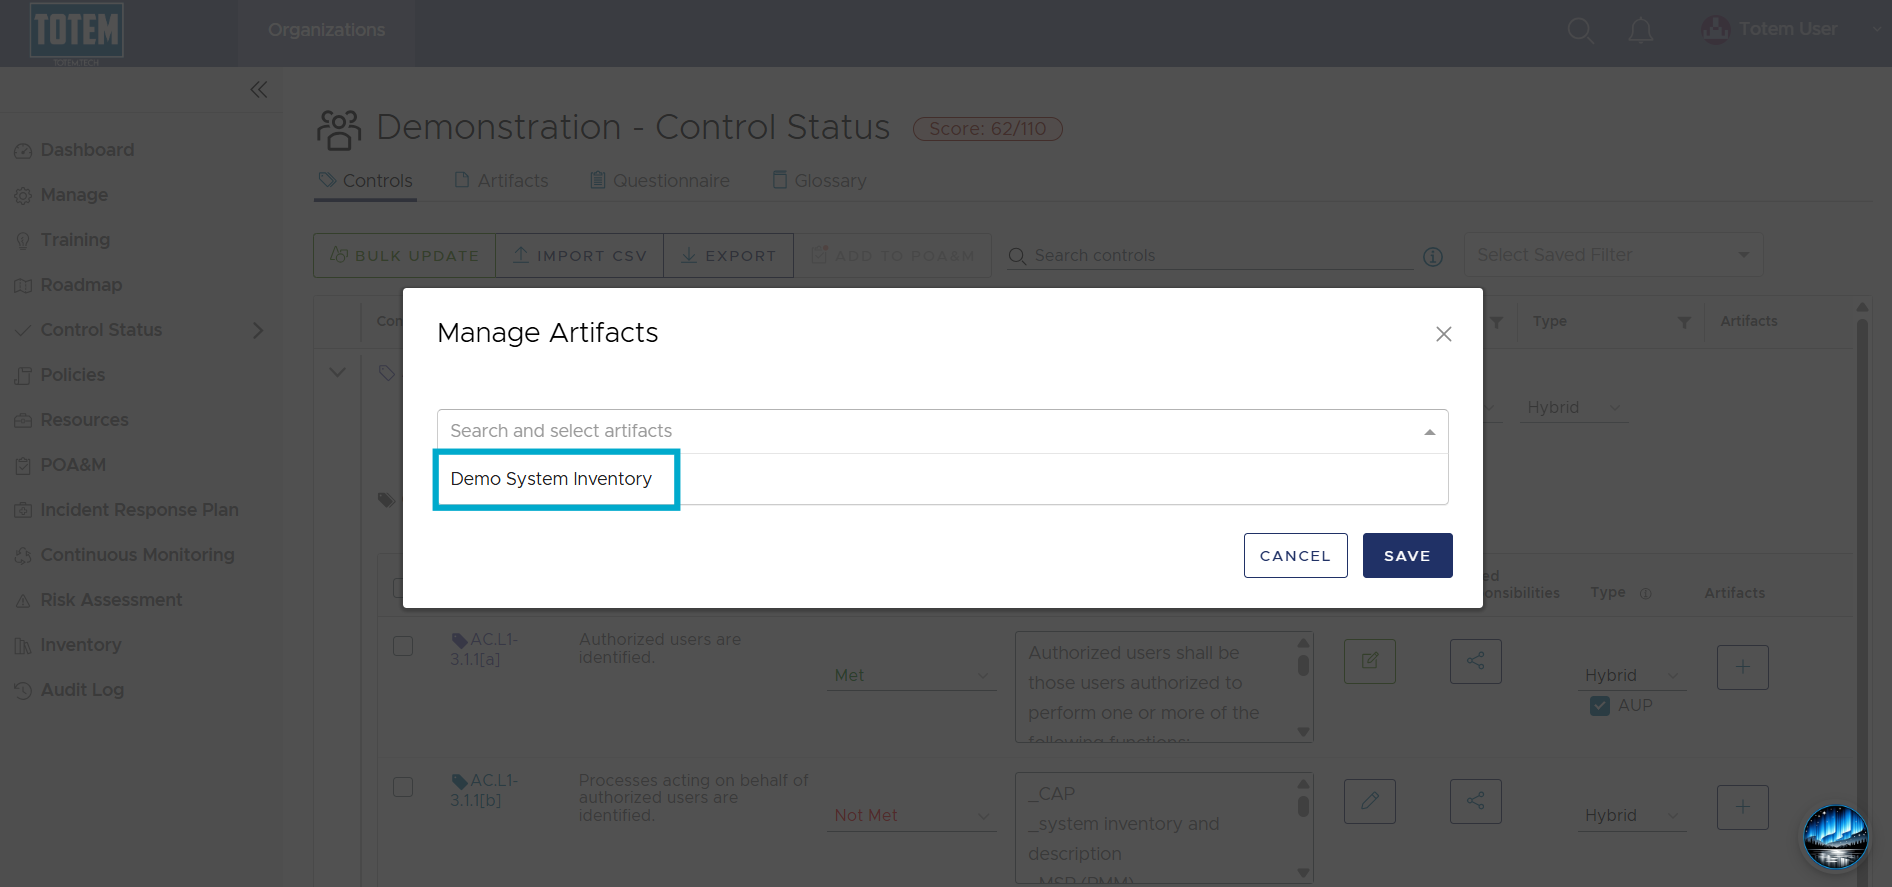
- Select the Artifact from the list.
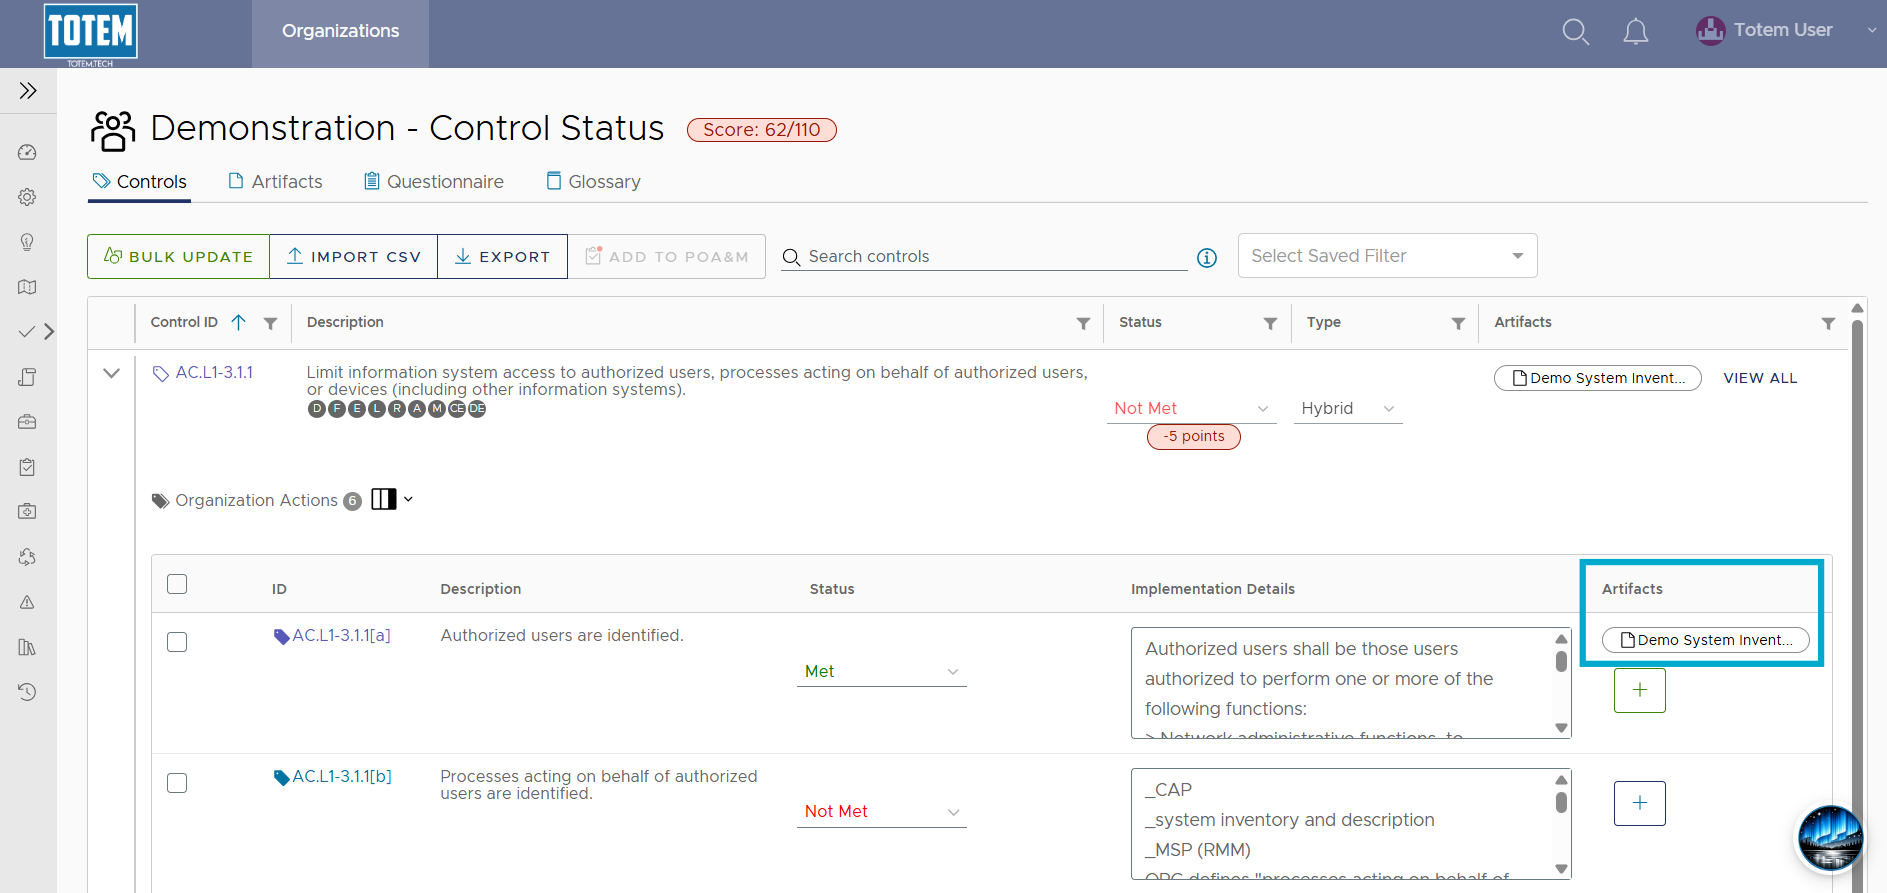
- The Artifact has now been “linked” to the security requirement.
- Updating Artifacts will automatically apply to any linked/associated items. In other words, when you add a new version of an Artifact, you do not then need to go and re-associate the new version with its relevant security requirements. Totem will do this for you automatically.
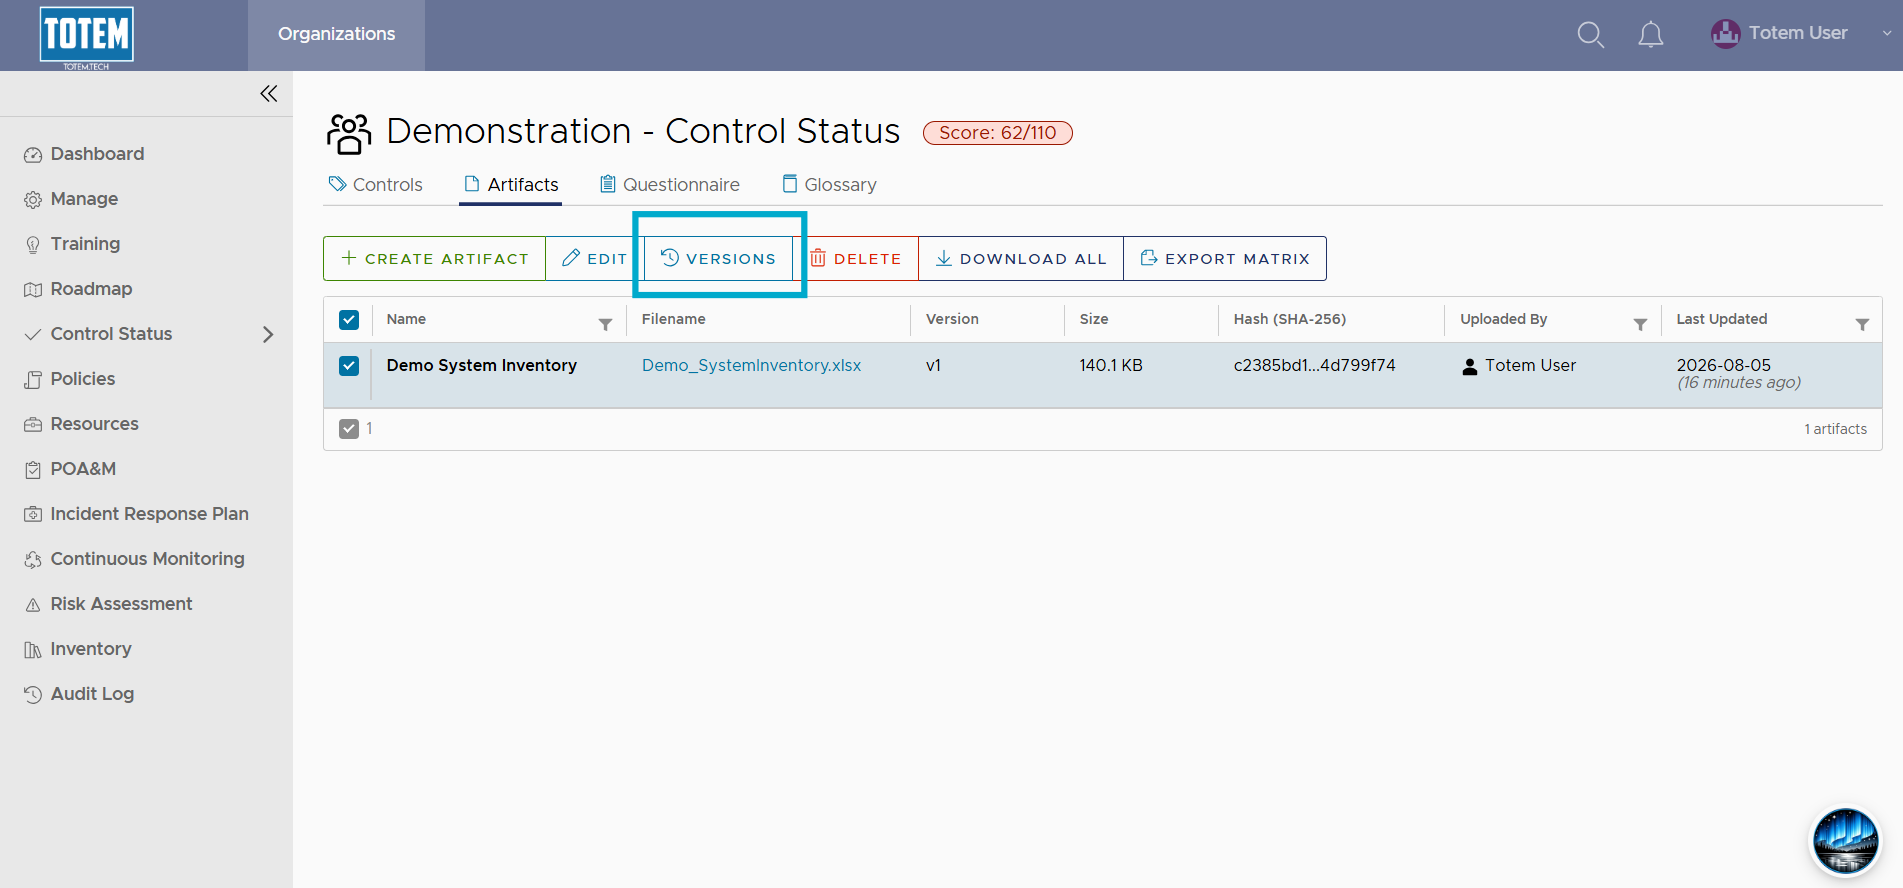
- To update an Artifact, navigate to the Artifacts page. Select the Artifact you’d like to update and choose Versions.
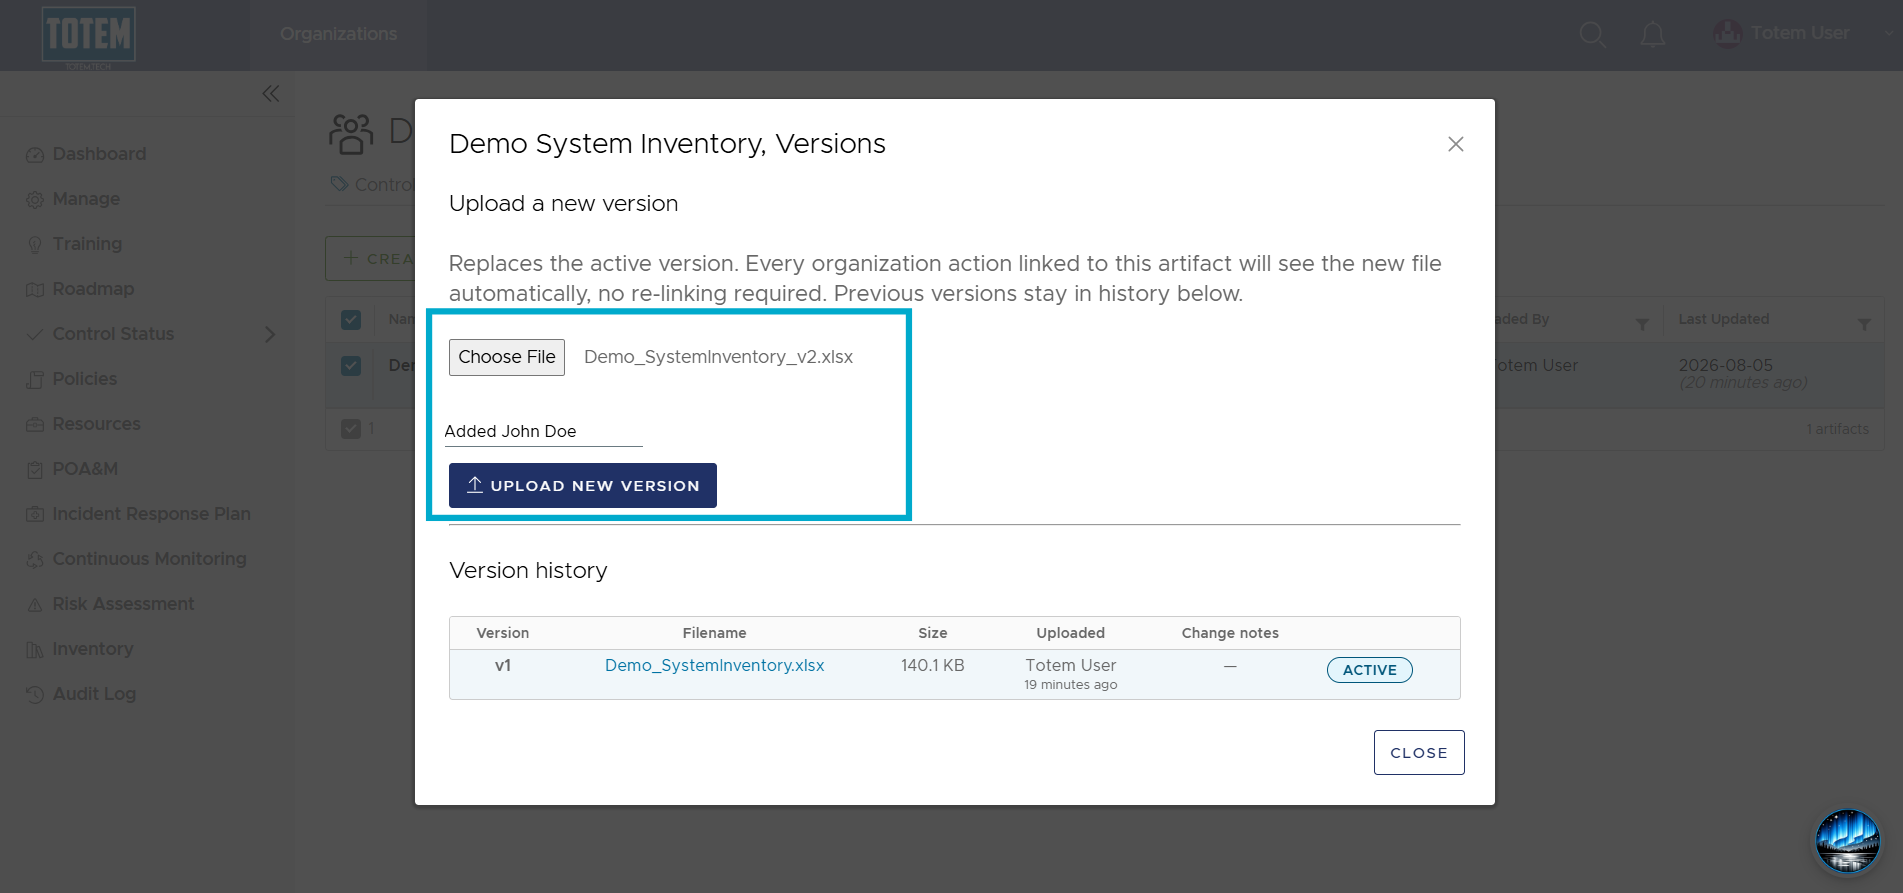
- Upload the newest version. Totem will compare the hash values of both files, and if they are the same, it will reject the new version. Versions are done by “major” (e.g., v1 to v2) rather than “minor” (e.g., v1.0 to v1.1). Provide any relevant change notes, then select Upload New Version.
- You’ll then see the new Artifact version applied. Note the Active version in the Version history table. If you ever need to revert to an older version, simply select the Revert option.
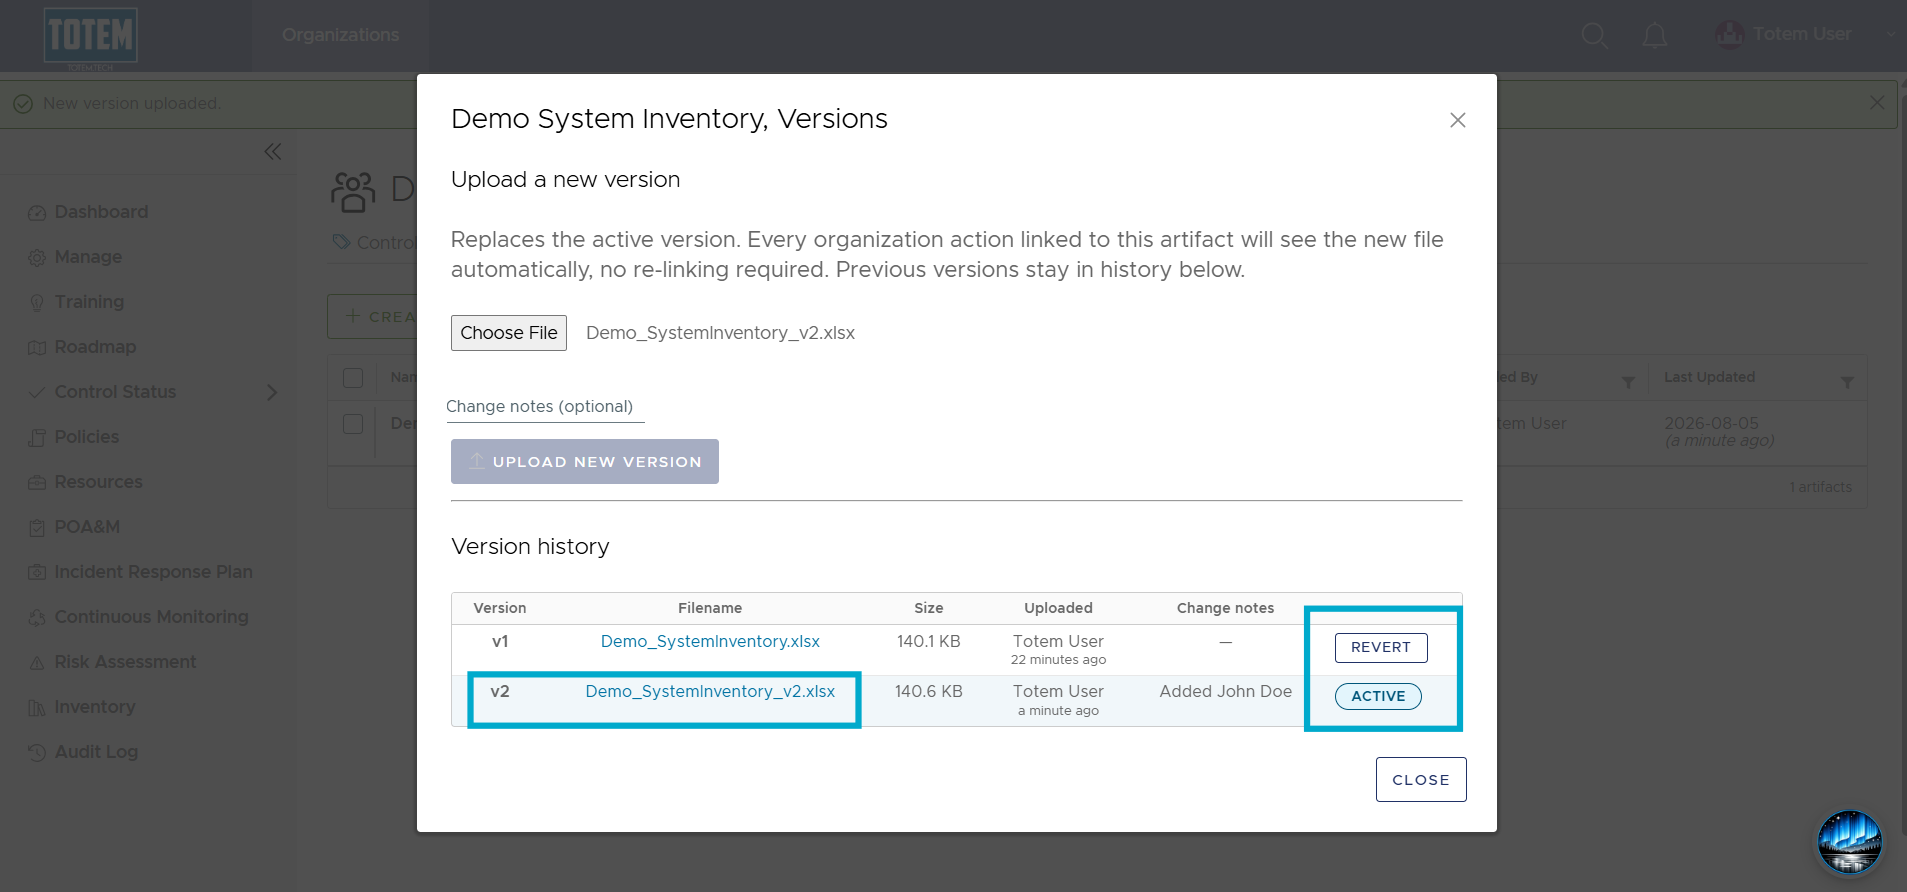
- All Organization Actions that were linked to v1 of the Artifact are now linked to v2.